Monday, January 26, 2015

The Black Effect

The Black Effect. Sounds so dramatic. Thing is, I don't even know if there is such a phenomenon as The Black Effect. I soley created it up here becuase it sounds effective for these pictures. Since I made it up, what do I mean by it? The Black Effect, in this case, defines as a silhouette that has been taken with movement.

What is this? A picture! Of course it's a picture, but what's the picture have on it? THE BLACK EFFECT! Haha, well there is a short story behind this picture. I woke up a lot later than expected, which meant I was late. I rushed and sped through my morning routine, and then hopped into the car. Literally. That's when I notice the beautiful sunrise in the distance. The sky was blasted with all sorts of colors. From the yellow-orange you see there, out to a purple. All those colors were just calling for a picture. Which meant I had to think of a way to enhance the colors a little bit, instead of just taking a plain picture of the sky. As I passed by trees after trees, I thought, why not trees? And here you see the colors beautified by the trees. The silhouette brings out the colors in the back, really making it pop out. What I did not expect was the show of movement. I expected the scene to just freeze, which would need fast shutter speed. You can see the motion with the blurred ground and even the slightly blurred trees in the back.

What do we have in this picture? Skiiers! Of course you see skiiers, but where are the skiiers? On a skii lift. And skii lifts are in motion right? Which leads us to... THE BLACK EFFECT! This picture has a short story as well... We were skiing and I took this picture while on the skii lift. My buddy next to me was creeped out because it was dark, the skii lift creaked, there were lights in intervals, and the lights were green! It wasn't really green but for some reason, it looks green here. Another question for you...did I take this picture in front or behind me? I took this behind me, which ended up being great for a silhouette. So where can you see motion in this? The right side is blurred ever so slighty. The lift wasn't going fast enough to get a good blur. Also, I edited this a bit. You can tell by the dust specks and the tear in the middle. I added those in, and it gives this old look. 


Sunday, January 18, 2015

Bethany beach in January

Back to our last vacation of 2014! Our last day of 2014 was well spent. We had too much fun and stayed up too late. The first day of 2015 was also well spent. I took two more trips to the beach throughout the day, both in which I took pictures for you here-


You know when the tide runs high, it leaves a heap of rocks and shells a little farther into the beach? This was that heap of pebbles and whatever may be hiding underneath. It has a nice field of depth, clear in the front and blurry the farther you go out. 

Whaaaat is happening here??? Looks interesting huh? Well here's a trick I recently learned through editing. First, this is a pile of pebbles. Then by editing, I layered the same picture on top, but it's upside down so that it's not layering the same thing. Then, I made the second layer rather transparent, which makes you wondering... Whaaat is going on. It's just something cool I found out.

Check out the beach! So calm...but you can't see the waves washing up on shore. Anyway, this was the view coming out from the boardwalk. 

If you look over the previous picture, this picture was taken right from that. There's really good clarity. You can see the immense detail on the wood, and the background is blurred out. The blurred background emphasizes the wood and you can sort of see the wood glowing. It seems as though there is some white light coming from directly behind the wood. The only thing I would have edited more is to crop out the little wood piece showing on the left, 

It's funny how much people take pictures of objects, but what about shadows? Shadows are the huge thing that people avoid in their pictures as much as possible. For once, we have the thing that follows one anywhere they go. I want to point out one thing when I edited this picture. The app I use allows me to add this effect called a light leak. It allows me to add "fake light" into the picture. In my opinion, they work best on people pictures when there is a lot of light. I decided to try it out here becuase it gives some color to the shadow, rather than the usual black. 

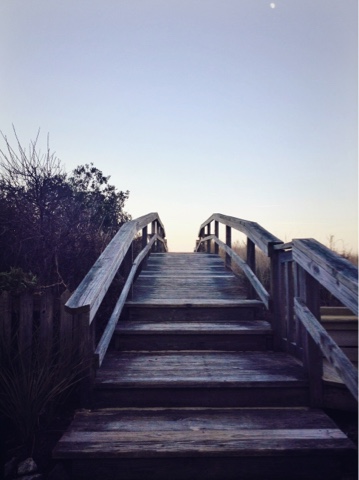
Here is the same picture from my other post but edited differently. I added a different filter and blurred out the top and bottom of the picture. (It blurred out the moon!) This makes you look dead center into the picture. On top of that, it really emphasizes the boardwalk.

Hope you enjoyed these pictures and learned a few cool tricks for editing pictures. Happy 2015! 


Sunday, January 11, 2015

Bethany Beach in December

Happy new year guys! I hope you all have an awesome new year and resolved to keep snapping some pics this year! :) 

Well, at the beach again! But not so far south this time. We landed in Bethany Beach, Delaware, about a three hours drive. Our family along with about seven other families stayed in a huge beach house for three days. The weather wasn't terrible, nor was it too warm. All the same, we had an awesome time!

This was actually the front door of the house. I took this picture from outside, so you are seeing the window and the curtain. Then you can see the trees behind me from the reflection on on the window. It's pretty cool because if you are looking at the top left of the picture, you tend to focus on the reflection, but if you are looking at the bottom right, you see the curtain. You can call it a two-layered picture. 

This is a picture that my awesome friend took, and I cropped it out alot at the top (people were walking by). I wanted this picture in here because it shows great field of depth. Blurry in the back and very detailed and clear in the front. 

Here we have the boardwalk type thing leading to the beach. When we went to the beach that day, the sky was just beautiful. We took some portrait pictures and the background just looked fake becuase it was too good. The sky had this canvas going from the richest blue down to a yellow-orange. The ocean too was really rich and extremely calm. You can see a little color starting to form here, but I took this picture before the sky was painted. If you look at the top of the picture, the moon made it in!

Here we have some beach houses and just sand. I wanted to point out the depth of field once again. The sand right in front of me is in a lot of detail. It gets blurrier the farther you go, but the houses are in focus. If you observed the sand, you can tell that it rained the day before because the sand is in some crazy texture. 

This was also at the beach the same day. There was this ridge of sand a little farther away from the waves. Erosion in action. In general, this is a pretty cool picture because it's got some neat edits. 

That was the first time we went to the beach that trip, which was on the 31st. I know, the last day of the year was well spent. I went to the beach two more times, so I've got more pictures coming up. I have to say, it was cold the first time we went. Absolutely super cold and windy. All of us stayed up to the point where we couldn't take another picture because our hands were just too cold. Literally. We ended up wearing layers and gloves and hats and scarves and... boots on the sand  :)


Saturday, January 3, 2015

Christmas Lights

Hey! Happy New Year! I hope you all have a fresh start to a wonderful year to come! Well over the past holidays, I've tried out a few Christmas pictures. I always get inspired by those really fancy Christmas tree pictures and I decided to try one out myself. I did have to research a bit to have a good idea on what to set the camera settings to and just how to take the pictures. It took a while to get it right.

Here was my first attempt. With no research or any idea of what I was doing. Just a blue light on the tree. And we have this really old, fake tree with LED lights, not the incandescent white or multi-colored ones. Those are on the stairs right next to the tree. 

This was the second attempt with some background knowledge now. You have to be pretty far away from the lights, and from the subject itself. This picture is decent, except the ornament could have been in focus much better. Notice that there's a light switched on at the right. It's not on in any picture, and having lights on in a room can make a difference. 

Here we have a light with lights in the background. The light is wrapped around the stairs on the side. So it was far enough from the tree to have a blurred light background. The technical term for this would be "bokeh" pictures, meaning "the way the lens renders out-of-focus points of light".

This is a white light hanging from the stairs. Plus, I took in the brightness of the light unlike the picture above. Notice the blurred lights on the tree are smaller than in the picture above. 
Here are just the lights from the christmas tree alone. You can make out the shape of the tree with the lights. (The Christmas tree is sideways.)

The lights here are bigger and more blurred. In my opinion, the smaller lights look better than these bigger ones. (The tree is sideways.)

Here I have the lights from the tree and from the stairs on the right. I could've made this a much better picture by straightening some things out. Making the stairs lights straight and not tilted. Adding a subject to the picture. Clearing up the lights on the tree, or even adding more lights because it looks awkward having only lights in two sections of the picture. 

This is a similar picture to the one right above. In this picture, the lights are much smaller, and the overall picture is zoomed out. 

Now that there's a better understanding of how to do a bokeh, it'll be much easier to take them later on. Although, I know I need a lot more experience, it's not that easy at first. Try it out for yourself!